Showing posts with label Pinterest. Show all posts

Sunday, November 18, 2012

Thanks Given - Day Eighteen

Today, I am thankful for Pinterest and the blogs I follow. Before you scoff and laugh and chastise, I will assure you that I am serious. :)

These things have helped me try new things and stretch outside the box when it comes to creativity, which is by no means my strong point. Today alone, I tried two new projects. First, I made salt dough ornaments for the girls to decorate. I realize this recipe is old as dirt, but I was "inspired" by Pinterest none the less.

I also decorated our stair railing with Christmas cards that we've sent out over the years and added in some Santa pictures too. I saw this one on Clover Lane. (I would link but I'm on my phone. Google it!)

I should also say I'm thankful Tom puts up with all of this too...

Tuesday, April 3, 2012

If These Walls Could Talk - Part Two

OK - this is moving week! It's so exciting to be moving into our new house, but I wanted to take a minute and remember our house on 150 W. (Just like I did at our old house here.) Although it has had it's challenges, we also made lots of memories as well. It's been a relatively short 8 months in this home but full of activity nonetheless.

Moving in was somewhat of an adventure because it took FOREVER! This was the first time we hired professional movers so we thought it would be a breeze. I think they pretty severely underestimated the time it would take to do the full move. Anyway, we finally got in and settled.

The house has a little step down into the playroom. I remember the first time we visited with Jack, my aunt Trena was with us and she said Nicole had a little step like that too in their old house. She said Jack would have it mastered within a few short weeks and he certainly did! It's hard to believe he had just started walking when we moved into this house!


One of the first, significant event that happened in this house was on August 13th. We were actually at the lake this weekend, but returned home shortly after on Sunday. This was day of the tragic State Fair Stage Collapse. Our Sales Consultant, Andrea, was very seriously injured and in a coma for weeks. She is on her way to an awesome recovery now, but it was a life-changing event for many people. I miss her daily and the first few weeks at this house were cloaked in a range of emotions and prayer for her.


The very day after the accident, was the night before Josie's first day of kindergarden. While it was difficult to be happy and excited, I think we managed to put up a good front. Nicole was over too and we all helped Josie pick out the perfect outfit. The first day of school is always an event to be celebrated and it was extra special considering it was our first born's first day of public school. She had a great two weeks with Mrs. Hahn and then, due to scheduling changes at the school, she was moved to Mrs. Brown's class and has had a wonderful year!


Tessa's first day of school came next. Another year at Bradley! It's hard to believe that in two weeks, I'll be taking her in for Kindergarden Round-Up!


I'm not sure exactly when it happened, but I nursed Jack for the last time in the rocker in his room at this house too. It's always a bittersweet moment. I cherish the time I get to spend with each of my kids in those days because it always passes so quickly. But, it also brings a certain feeling of independence as well when that time is over.

Thanks to Pinterest, we've done a bunch of crafting in this house! I think I had extra free time since it was a smaller house and we didn't have as much to maintain. Either way, we surely had fun!


Josie had her first "scary" Halloween costume here too!


And, Jack learned to dance. :) He and his sisters had many dance parties in this house...


Josie also celebrated her 6th birthday in this house! She had her first true "friend" birthday party complete with goodie bags and a pinata!


On Thursday, we'll be moving on to a new chapter in our lives. We don't know how long we'll live in this house but I imagine we'll see plenty more firsts - first bus rides, more first days of school, first bike rides with no training wheels, first sleep-overs, and maybe even first boyfriends and first dates. Oh, what an adventure it will be!

Monday, March 5, 2012

Smoothies!

I get on kicks. It may be a low carb kick, a low calorie kick, a running kick, a reading kick, a crocheting kick, but I'm always on something. (That sounds bad, but you know what I mean.) I'm hoping that this next kick sticks around a little while and may work itself into being at least a weekly activity.

Since I've been not able to run and been on vacation (both are related but for another post), I've watching two or three pounds creep on. Now, that would be OK if I hadn't already been two or three pounds up since Christmas. Over the weekend, I hit THAT number. You know the one. The one that makes you wince when you get on the scale and say how did let THAT happen?! The one that makes you vow to not eat [fill in blank with current vice here] ever again. The one that makes you swear you'll make it to the gym every day this week. Yep, THAT number.

A while back, I created a Smoothies Board on Pinterest. My lunches and breakfasts are less than stellar these days and my fruit and veggie intake is next to nothing. I'd love to blame it on my busy lifestyle, but the truth is that I just don't make time for it any more. So, I decided to give this a try.

Over the weekend, and on another trip today, I picked up what I thought to be smoothie essentials. I also had some things on hand. Here is a list of what I planned to use.

Ice
Soy Milk
Almond Milk - Dark Chocolate
Coconut Water
Greek Yogurt - Vanilla
Truvia
Strawberries - fresh and frozen
Blueberries - frozen
Bananas
Spinach
Pineapple - fresh and frozen
Vanilla Protein Powder
Flax Seeds

I told the girls we were making smoothies for lunch and they were stoked. This helped a lot with my excitement level too.


I let them make the first batch. I have a great blender that has two spots for separate glasses to blend. This allowed each girl to make their own. (And, later, I could make a small serving too.)

Josie's first concoction - strawberries, bananas, Greek yogurt, coconut water, soy milk and a tiny bit of Truvia. Verdict - delicious. She drank the whole glass!


Tessa's first try - strawberries, Greek yogurt, coconut water, Chocolate Almond milk and Truvia. Verdict - I thought it was awesome. Tessa didn't like it because the strawberries made it too seedy. I see where she would think that. It's just a texture thing.


Up next...

Josie - blueberries, coconut water, Greek yogurt and protein powder. She downed this whole glass too! I save a little of this back for my project at the end.


Tessa - Chocolate Almond Milk, coconut water and Greek yogurt. This tasted like a milk shake. She loved it! Gone!


Third try...

Josie - pineapple (mind you, she didn't think she like pineapple!), Greek yogurt, protein powder and coconut water. I think this tasted like a Dole whip if you've ever had one. Josie loved it too and Tessa tried a little and liked it. Then she spilled hers and didn't seem upset in the least, so not really sure how she felt about it. Josie was pleased she found something new she liked!

Tessa - strawberries, protein powder, coconut water and Greek yogurt. I think she was over it by now, but said it was good. I thought it was really good! I saved the extra out of this too for later.

All in all, it was a success for the girls. For two little ones that don't eat much fruit and would never touch Greek yogurt, I feel like I was able to get lots in their bellies. Plus, the coconut water has a lot of potassium and Vitamin C. It's too bad spinach is so green because there was no way to sneak that in!

As for me, I'll see if I can sum up everything I tried. First, I ground up some flax seeds in the blender. I didn't try to get them totally pureed because my machine isn't powerful enough for that. Then, I added some spinach and coconut water. It was hard to get the spinach pureed without liquid. I added that batch to Tessa's leftovers from her first try (chocolate/strawberry). I was blown away at how yummy it was! If you can get past the awful way it looks, the taste is surprisingly refreshing. (I'm serious - it looked disgusting!)


The next thing I did was some prep work so that I can enjoy these on busy mornings. I mixed the leftovers from Josie's blueberry and Tessa's strawberry (no chocolate). I put these into six muffin cups (another Pinterest find!). Then, I sprinkled flax seed on top. Back to the blender with spinach and coconut water. I added in a banana and some chunky almond butter. I tasted this mixture and probably shouldn't have because it was missing an important ingredient - ice! Eww! But, the taste was just fine. I put this in muffin tins too.


Both sets of smoothies are in the freezer. When they come out, I'll get them out of the cups and put them in a Ziploc to keep in the freezer. My hope is that I'll be able to pop a few in the blender for a quick and healthy breakfast!

And, love Instagram... :)
Sunday, October 23, 2011

Pumpkins!

Since this is the last weekend in October we will be at home, I realized yesterday that we MUST do pumpkins! Tom golfed yesterday and I was bumming around the house trying to think of something to do. I have seen a bunch of painted pumpkins on Pinterest and wanted to try it out.

The first try was miserable. I'm not sure what's up with the supposed acrylic paint I have in this set, but it doesn't work. (Now that I think about it, it may be that it was on major clearance at Walmart.) It wasn't even close to thick enough.

So, I wandered into the garage hoping I may find an easily accessible bin marked "paint supplies" that may contain something more fun. I didn't have to go too far when I stumbled across the mother lode - spray paint. And, lots of it. After experimenting with hammered silver and glossy black, I landed on a shiny gold. (The black was actually cool too, but it rolled the wrong way off the stone and became a casualty.) Here's the solid gold pumpkin.


Tom sent me out for dinner supplies and I hit the craft aisle at Walmart. I picked up some good acrylic paint, puffy paint and some ribbon. I came home and painted these bad boys. (The letter is supposed to be a J but Tom thinks it looks like a T).


Then, today after church, we picked up full sized pumpkins for carving. Well, we thought we were going to carve them. But, the girls begged to paint them and it wasn't hard to convince us not to make the mess. So, we tried something new! They really turned out so much better than I thought. And, it gave them the chance to be involved with the process since they're not old enough to use a knife yet.

Here's Tom with the ugliest pumpkin.
Working hard!


And, the finished products.


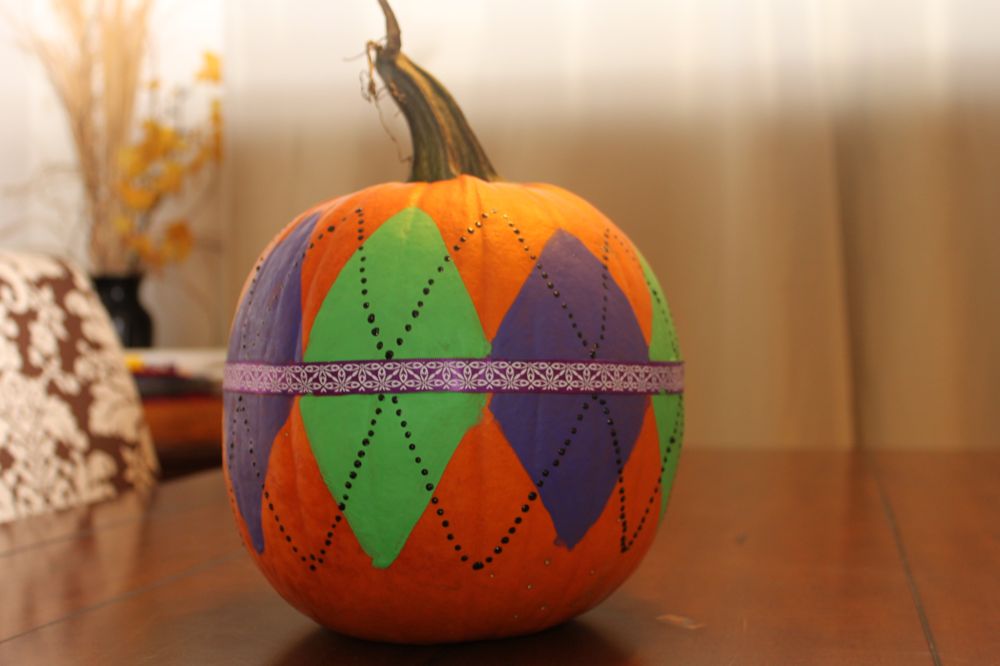
I took a stab at an argyle pattern. If I were to do this again, I would actually cut out a diamond pattern and trace it onto the pumpkin. But, it's kind of cute anyway. 

On display!


And, my favorite picture of the day. Tom is really so talented. I love this pumpkin!

Friday, October 14, 2011

Bake Sale Goodies - Halloween Style!

So, on my way home from taking Josie to school today, I was trying to decide what to do while we're around the house. I knew I had to head into the office to take care of a little business while the girls were both at school. Plus, I promised the girls we could go to Walmart to pick out their Halloween costumes after school. Once I got home at 7:45, I received an email from Josie's principal about still needing baked goods for the "Sweet Shop" at the Fall Festival tomorrow. (How cute is that by the way?! So much better than "Bake Sale.")

Perfect. Day officially planned. I always get into baking in the Fall but I also always seem to be watching what I eat and since I have absolutely NO willpower, I can't have that stuff around the house. So, I got my act in gear and went on Pinterest for some inspiration. I found a few cute and relatively easy things to make that would be perfect for a Fall Festival Sweet Shop. I passed on some pretty awesome looking Maple Pumpkin Fudge because a few reviews talked about timing being perfect. My timing is never perfect so it was out.

After Walmart, the girls and I proceeded to prep for our baking extravaganza! We put Jack to bed only to learn that he didn't want to nap and instead wanted to strip down to bare behind and dance in his crib. (Side note: I figure I'm due for this one. Three kids and this is a first...Boys...) He played quite nicely the rest of the afternoon.

First, we baked the cupcakes inspired by this recipe. I'm not proud and just went with Betty's mix. I picked chocolate because I thought the dark bottoms would be more "Halloween-ish." The girls helped with the mix and getting the cupcake liners ready.

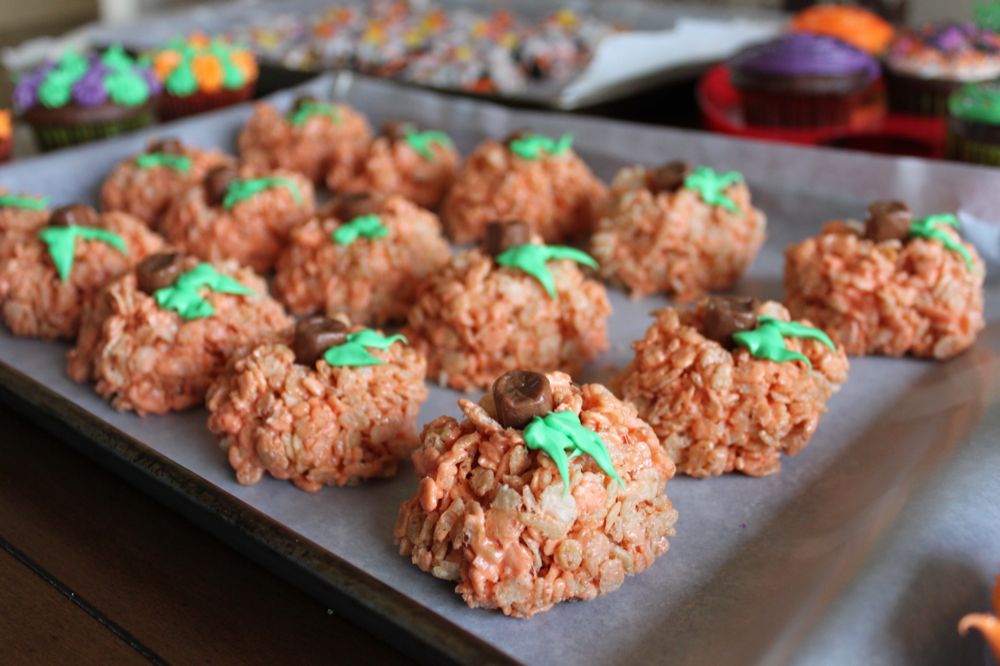
Once the cupcakes were in the oven, we moved onto the Pumpkin Rice Krispie Treats. This is about when the girls lost interest. I found myself literally glued to the mix. I admit that Rice Krispie Treats should be easy, but man, molding them into the pumpkin shape was a mess. Melted marshmellows are apparently super glue. I ended up plastering my hands in Pam in between each pumpkin, which worked really well. Despite my issues, they turned out super cute. (Just click on the links for each of these treats to find the recipe. I just followed them as closely as I could.) The girls enjoyed getting the left overs off the spatula. I, on the other hand, did NOT enjoy getting the leftovers out of the bowl - did I mention super glue?


Finished product...


Then, the girls got involved again when making the Halloween Candy Corn Cookie Bark. I had them break up the Oreo's and pretzels and then sprinkle the candy corn. Meanwhile, I melted the Almond Bark. I've never used this stuff before and it was AWESOME! It tastes really good and isn't chocolate. It's truly vanilla candy coating. This was really easy and I think I could probably come up with my own recipes based on this stuff. I'll definitely be using it this Christmas for some Peppermint Bark. Once that went in the fridge, the girls were really done with the helping. This stuff looks awesome. Didn't get to try it, but may be buying it tomorrow at the festival. :)


I used the rest of the Almond Bark for covering some Halloween Oreos and pretzels. I added some seasonally appropriate sprinkles for good measure. (No picture of these, but they turned out cute. See the picture of everything to catch a glimpse.)

Finally, it was time to decorate the cupcakes. The girls love this part because they get to lick the bowls of icing once I've mixed it up and put it in the piping bag. I've come to the conclusion that cupcakes (and probably cakes for that matter) look a lot better when the icing is BOLD! This is hard to achieve with regular food coloring. I use the Wilton colorings. They're more difficult to use but the results are much better. I also use the Wilton kit for cake decorating - it was probably $9.88 at Walmart. I do think I'll get a full set of dyes though. I have a spring collection and then one or two others. A few sprinkles and we're done!


Jack enjoyed hanging with us today and must have known we were up to something because he moved the cupcake carrier lid over to the table to try to get a closer look and probably swipe something.


What a full day, but a fun one. I found myself frustrated a few times with the kids, but then realized this is why I'm doing these things. I got the stuff out of the house as fast as I could. I took it down to the school tonight. I saved out a few Oreo's and candy covered pretzels for tomorrow. ("Binge Day" on the new diet - more later - tomorrow so I figure I can try one.) Happy to have a reason to do some work in the kitchen today! Here's the final product!

Sunday, September 25, 2011

Personalized School Work Boxes - Part One

So, the kids' sitter is off this coming week and I was at Walmart alone on Friday. What did I end up with? A couple file boxes, two huge packs of scrapbook paper, spray adhesive, ModPodge, file folders and three canvases. For those that don't know me well, crafting is NOT my thing. But, I was caught at a weak moment and just started throwing stuff in my cart for two projects. (Initially, I had grabbed two three ring binders for the girls and some sheet protectors and was going to call that good for this project.)

I was actually able to get started on my first project this weekend as Tom was gone for a golf outing. I have seen this posting by I Heart Organizing on Pinterest many times. She put together file boxes for each of her boys with folders for each year. I loved that she put the school picture on the front of each folder. Her post also includes free printables for the file folder cover sheets and labels. I'll be working on this in the coming week as my printer is not yet set up.

In the meantime, I decided that I wanted to take this one step further and make personalized boxes for each of the kids. Before you give me too much grief, no, Jack does not have any masterpieces yet. But, one day he will and his box will match the girls'. (And, I've contemplated adding a folder for important papers - shot records, doctor visits, etc.) I decided to document the whole thing with photos so I could share it here with you good people...

Here is the box I started with. They were $5 at Walmart this week. It's a nice plastic box with a latching lid. It's not too big and not too small. I think one file folder will be appropriate for each years' papers, report cards, etc.


I started by letting the girls pick out the colors they would like for their names. Here are Josie's choices.


OK - take that back - she picked other colors first and I guided her in another direction. I decided to use the orange she originally chose as a template. I realized that the kids have a lot of the same letters and it was silly to continue to recreate the correct size and look of the letter. Plus, it became more of a "font." It also allowed for me to have a messy template - it took a few tries to get the letter looking the way I wanted it. This will make more sense in later steps.


My model with one of my templates.


Once I had the template cut, I traced it BACKWARD onto the actual page I wanted to use. There are two reasons for this. One, I had textured paper and I wanted the texture on the outside. Two, which I guess is really the same as one, I didn't want trace marks on the side that would show.


I was worried the girls would get in the way, but they managed to keep themselves busy. (Jack was napping.)


Here are all of the letters for Josie!


Then, I placed them on the box the way I wanted them to look. I couldn't really come up with a great way to mark their location, so I just took a picture.


I used spray adhesive to get them to stick to the box. I will caution you - it does not take much! In fact, I'll likely be redoing Josie's because I used to much and there is adhesive everywhere. Learned my lesson and Tessa and Jack's are much better.


I sprayed it in my sink and over newspaper just in case. (You can see the junk in this picture. It does NOT dry clear.) For Josie's I may try ModPodging over it to see if that hides the imperfection. It can't hurt anything.


And, the finished products!


Now, I have to keep these templates and figure out what else I can do with them!


Stay tuned for part two of this project. I haven't decided if I'll be using the free printables or making my own. All in all, a VERY easy project which is just what this girl needed!